| T O P I C R E V I E W |
| carr13 |
Posted - 01/09/2010 : 19:36:02
This is based on the tree stump hide, though if you use your imagination you could make anything from a rock cave to a fallen log style hide, I chose the tree stump as it's my fav lol.
Things you will need.
1. Some air drying clay (can be found on e-bay or amazon in various weights, how much you need depends on the size of snake you are making the hide for a couple of kg should do it)
2. A rolling pin
3. A sharp knife
4. A small bowl (for mixing your slip and using as a template for the base)
5. A fork or something to texture your hide
6. A jay cloth (for putting your hide on while making it as the clay might stick to the surface you are working on)
7. Acrylic paint in the colours you want your hide in
8. A paint brush
9. Some none toxic clear varnish
Now time to get messy and make your hide!
Grab a large lump of clay and place on damp jay cloth, then roll the clay out till it is about a 1 cm thick
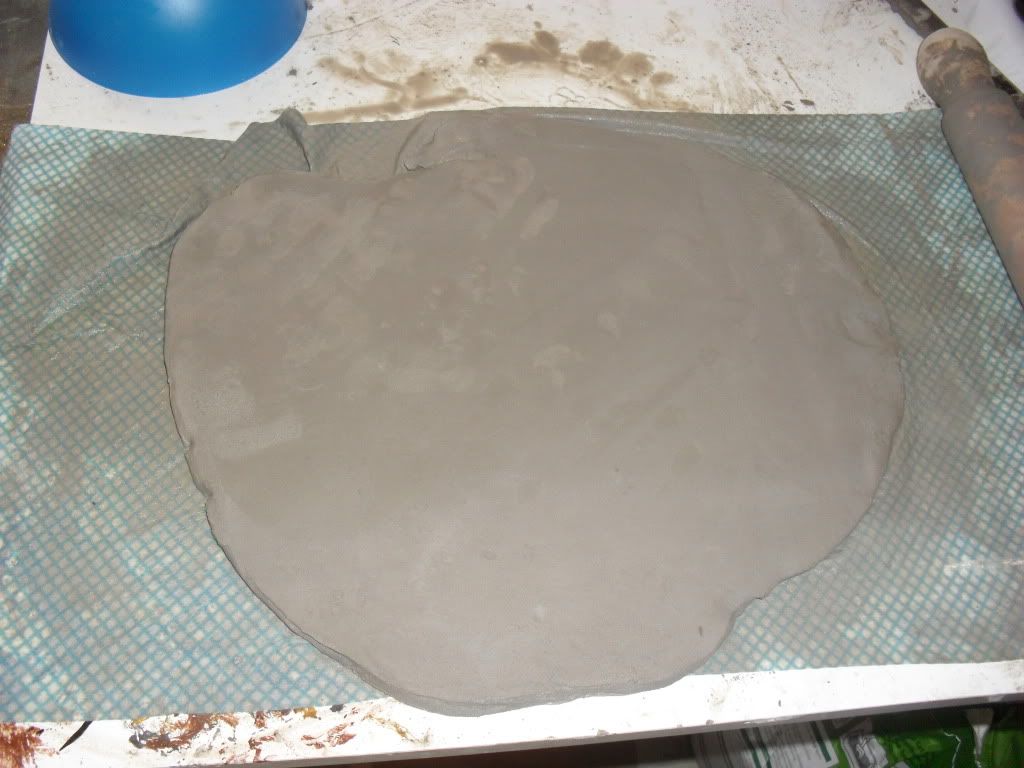
now get your bowl and place it on the clay, draw around it for the base and cut it out do this twice as you will also want a lid for your hide

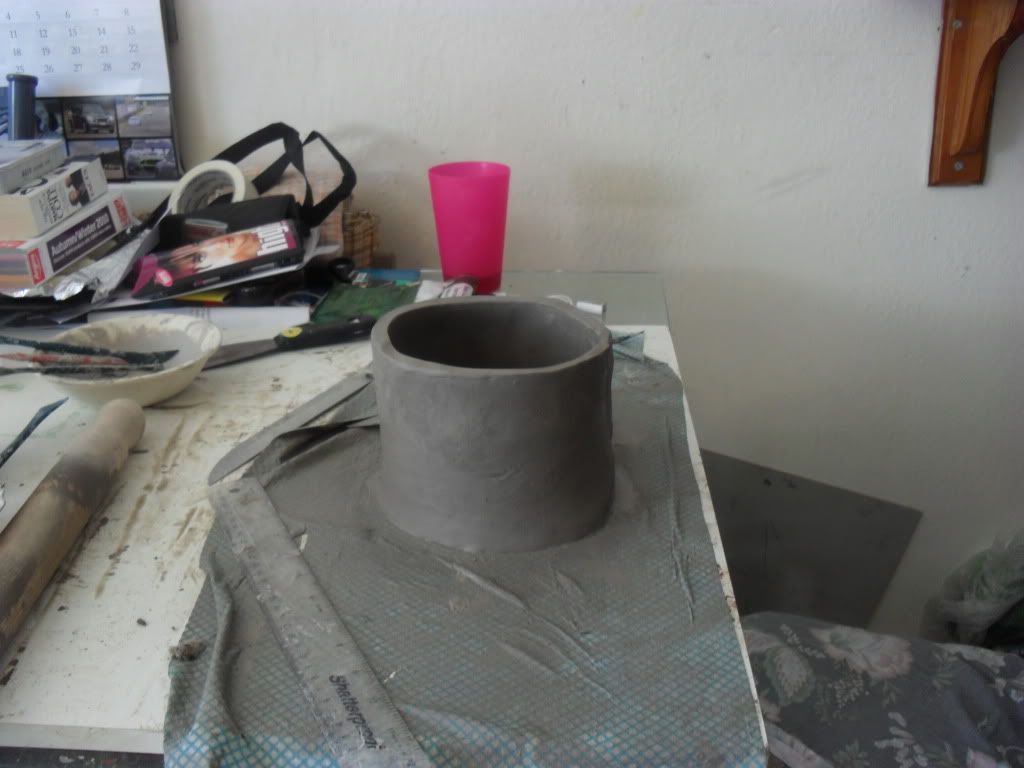
now you will have to take the remainder of the clay left after cutting out the base and roll it into a sausage shape, you then roll this out with the rolling pin to make a long cm thick slab again trying to make it long enough to go around the base to create the sides, you dont want it to tall or your snake will have to much space and will not feel secure. Dont worry if the ends of clay don't fit exactly because you want gaps at the top and bottom to create interesting entrances and exits to keep your snake entertained lol. As long as the ends of the clay will meet for a couple of cm's you will be fine.

Now cross hatch around the base and the length of clay you will be joining together to create the body of your hide.


Now make some slip, use the bowl you used as a template and put some clay in it and add some water mixing it until you get a thick milkshake consistency, you then put this on the 2 edges you wish to join together to create your hides main body, press the edges together and blend them so they appear seamless and appear securely joind
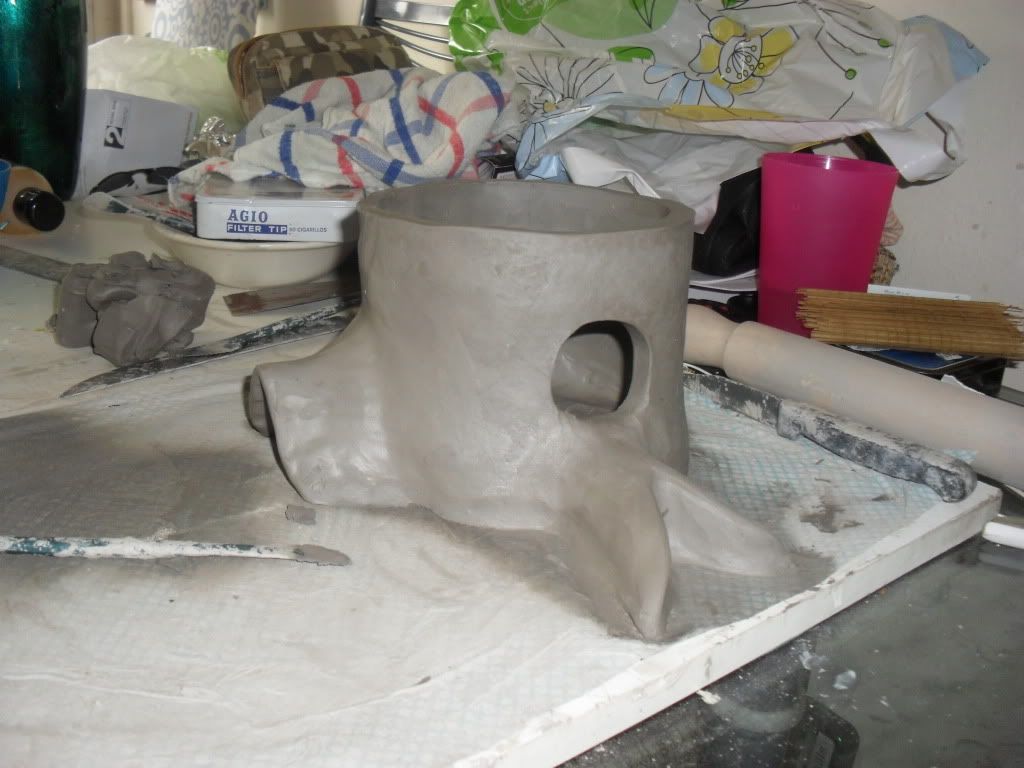
This is how it might look if edges dont join from top to bottom giving you an interesting entry.

Now using the cross hatching and slip method join and additions you wish to your hide i.e. roots, or tunnel bits for exits an entries, see below for some ideas, also at this stage cut out any further exits and entries you want in your hide.


Now guys it's time for the lid, now if you are like me you have done a top and bottom entrance, if so the lid will have to fit in with this

your lid will also need a inside lip so that it doesn't slide of when snake is messin about in there, so cut out some 1 cm thick by 1 cm deep and long enough to go around your lid (missing out any bits you have cut out of your lid) now attach these strips to the underside of your lid using the cross hatch and slip method

the last thing you have to do at this stage is add any texture you wish to create a more realistic hide i.e bark on a tree you can do this by flicking a fork across the clay surface of your hide creating a rough feel to the clay, when dry you need to brush off any none secure clay.
Now it's time to wait,,,,,,, leave your hide to dry out usually a couple of days will do it, you will see the change in the colour of the clay and feel of it.
When it is dry you can get creative and paint it how you want to with your acrylic paints (this gives it a waterproof coating aswell).
Once the paint is dry you can varnish your unique hide, give it 2 or 3 coats to make sure it is water proof.


TA DA you have a brand new unique hide for your snake and you will have had fun getting creative and messy.
I hope this has been useful for some and thank you for taking the time to read this thread
|
| 1 L A T E S T R E P L I E S (Newest First) |
| Tawfik47 |
Posted - 14/09/2011 : 11:25:44
Good job .. |
|
|
